A contact form is a good idea because it helps build credibility with your visitors as well as with Google. In this article, I will show you how to add a contact form page to your blog on blogger.
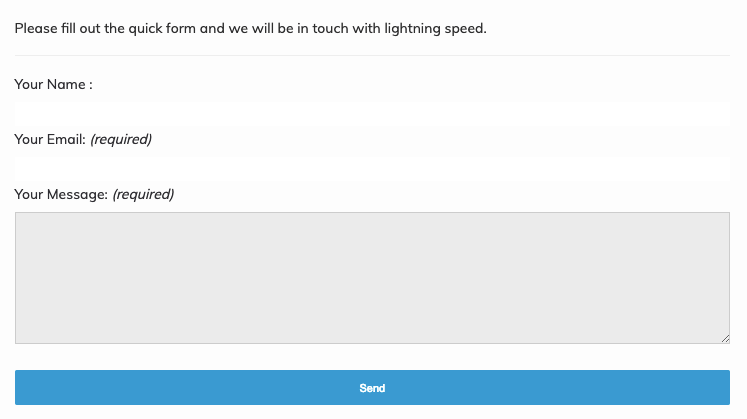
Here we will create a fully responsive and good looking contact form. Your Contact form page is looking like this:

First of all, You need to login to your blogger account. You can add a contact form in 2 ways.
1st method to add a contact form in Blogger Sidebar.
With the help of Gadgets provided by google blogger, in sidebar or footer.

Follow the below steps:
- Go to Blogger Account
- Click on Layout
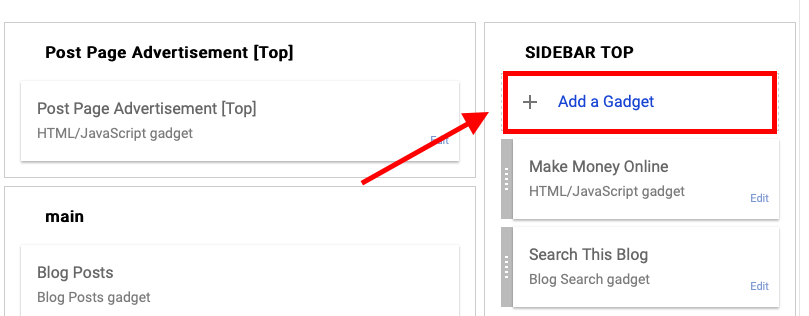
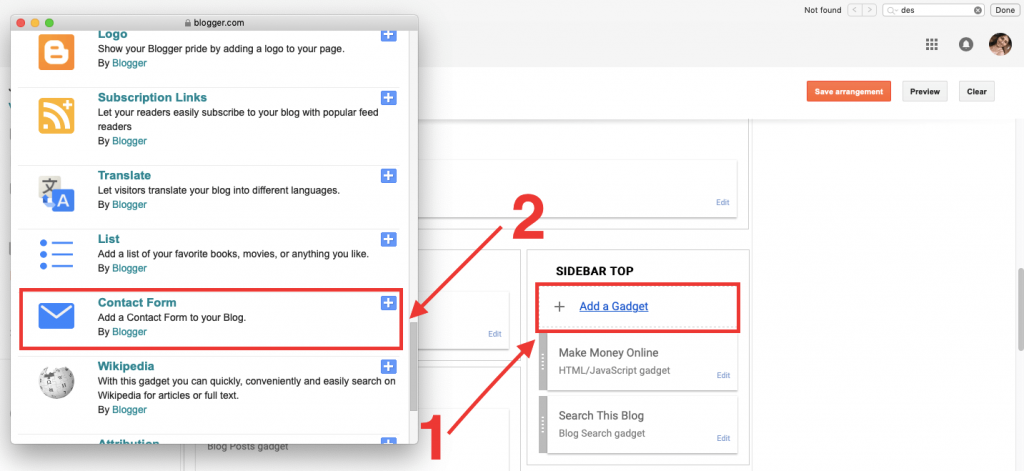
- Scroll down and find a place where you want to place your contact form like the sidebar (As shown in the above image) or footer.
- Click on “Add a Gadget” and A Pop-up will open with lots of gadgets.
- Scroll down and select “Contact Form” or click on “+” sign

- add a Title for your Contact Form and click Save.
- That's it!!!, you have successfully added the contact form in the sidebar.
2nd Method to add a contact form in Blogger Page
Follow the below steps:
- Go to Blogger Account
- Click on Pages.
- Create a New Page and add Title “Contact us/Contact me”
- Paste the Below HTML code
<form name="contact-form">

<div>

Your Name : </div>

<input class="contact-form-name" id="ContactForm1_contact-form-name" name="name" size="30" type="text" value="" />

<br />

<div>

Your Email: <i>(required)</i></div>

<input class="contact-form-email" id="ContactForm1_contact-form-email" name="email" size="30" type="text" value="" />

<br />

<div>

Your Message: <i>(required)</i></div>

<textarea class="contact-form-email-message" id="ContactForm1_contact-form-email-message" name="email-message" rows="5"></textarea>

<br />

<br />

<input class="contact-form-button contact-form-button-submit" id="ContactForm1_contact-form-submit" type="button" value="Send" />

<div style="max-width: 450px; text-align: center; width: 100%;">

<div class="contact-form-error-message" id="ContactForm1_contact-form-error-message">

</div>

<div class="contact-form-success-message" id="ContactForm1_contact-form-success-message">

</div>

</div>

</form>
- and click on Publish Button.
- That's It!!! You have successfully created a page with Contact Form.
- Make sure to test your contact form. whenever someone fills and submit the form. You will get email on your registered email on blogger.
Lastly what you may want to do is sort of post a little message “privacy message” saying that you know to respect the privacy of the individual contact and that you will not divulge your their email address and things of that just a little note there just to reassure them. so that's pretty much if you know.
If you've got any questions, leave them in the comment section and if you found this post is useful, please share with your blogger friends and community. I'll see you the next time. Thank you!!!
Read More:
- Top 100 Best Ways To Make Money Online
- How to Add Instagram Tab on Facebook Page
- How to Add MailChimp Form in Facebook Page | Increase Email List's Subscribers
- What is Search Engine Optimization And Why You Gotta Use It?
- Free Tools & Resources for Top Newsletters That Don't Suck


4 Comments
Dear Sir,
Your Post is very Informative for us but you have to prefer attractive and UI contact us form in blogger
Thankyou Sir. Very Good Helpful Information.
Seems that I couldn’t click on submit button after using this code.
Thanks for sharing helpful!